GitHub Actions is GitHub’s built-in CI/CD tool that automates building, testing, and deploying code whenever changes are pushed to a repository, reducing manual effort and repetitive tasks.
- GitHub Actions automates build, test, and deployment workflows on every repo change.
- Continuous Integration (CI) involves frequently merging code into the main branch.
- Manual deployments for every change reduce productivity and repeat work.
- CI/CD workflows automatically build and deploy code after changes.
- Enables automatic deployment of updates (e.g., static HTML to GitHub Pages).
- GitHub provides ready-made workflows for HTML, Node.js, Python, and more.
Github Actions
GitHub Actions is a platform built into GitHub that automates all the SDLC steps like development, testing, and deployment.
- Event: Triggers the GitHub Actions pipeline (e.g., push, pull, merge).
- Workflow: Runs tasks triggered by events, defined in a YAML file under .github/workflows.
- Jobs: Groups related tasks into ordered steps within a workflow.
- Actions: Individual steps in a job, using shell commands or reusable actions.
Continuous Integration
Continuous Integration (CI) is a development practice where developers frequently commit code changes to a shared repository to detect and fix issues early.
- Code changes are committed multiple times a day to a shared repository.
- Helps identify and resolve bugs early in the development cycle.
- Supported by various CI tools chosen by teams.
- Often includes features like test servers and automated test reports.
CI Workflow Setup Using GitHub Actions
Step 1: Create an Empty GitHub Repository

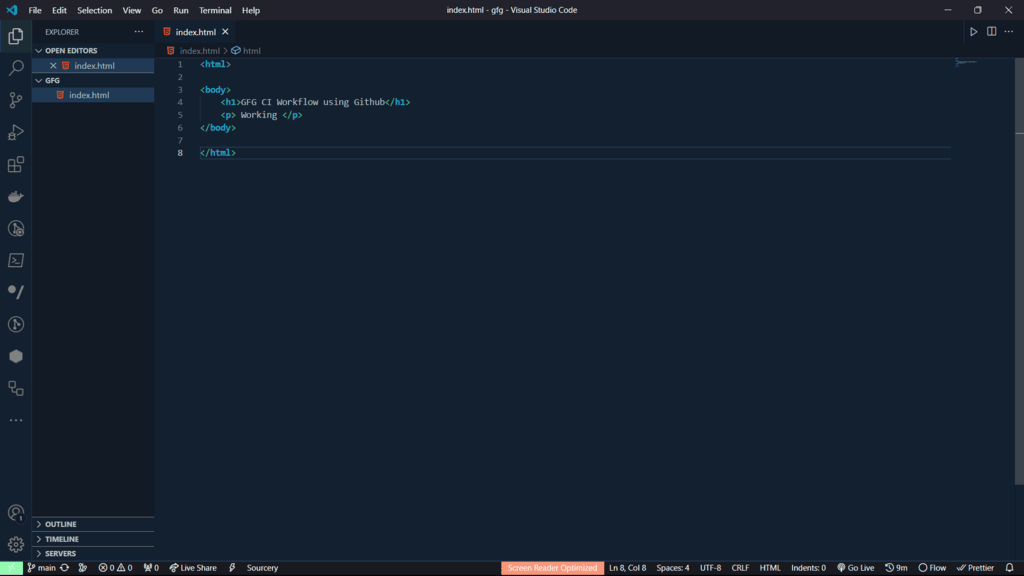
Step 2: Open your project in any text editor and create a simple static HTML file with a heading and a paragraph/any content.
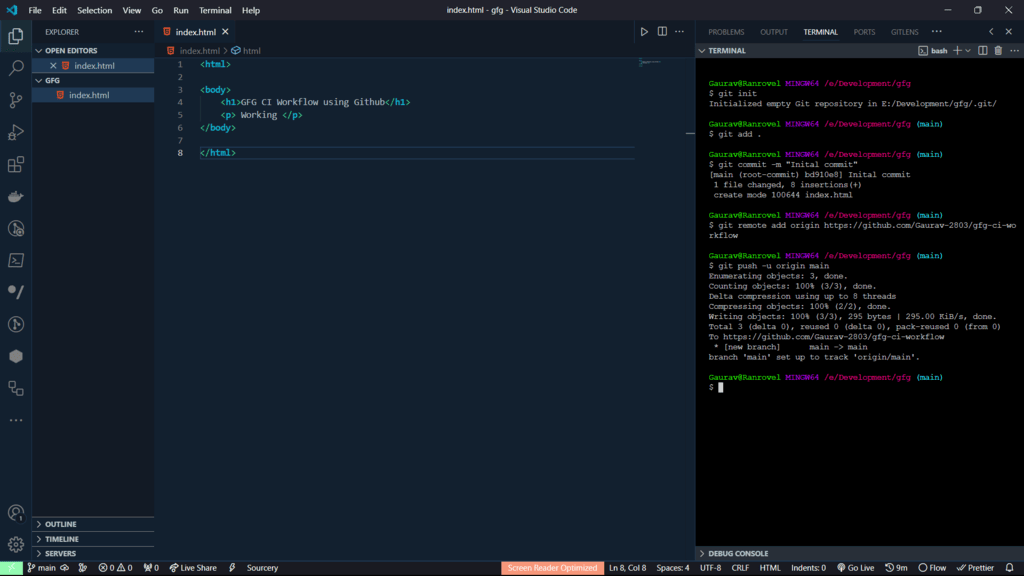
Step 3: Open Git terminal and Push your project on the GitHub Repository using following steps.
- Initalize empty Git repo using git init.
- Add files to staging area using git add .
- Commit your changes using git commit -m "your message".
- Create remote origin using git remote add origin "repo link".
- Push the project using git push -u origin main.
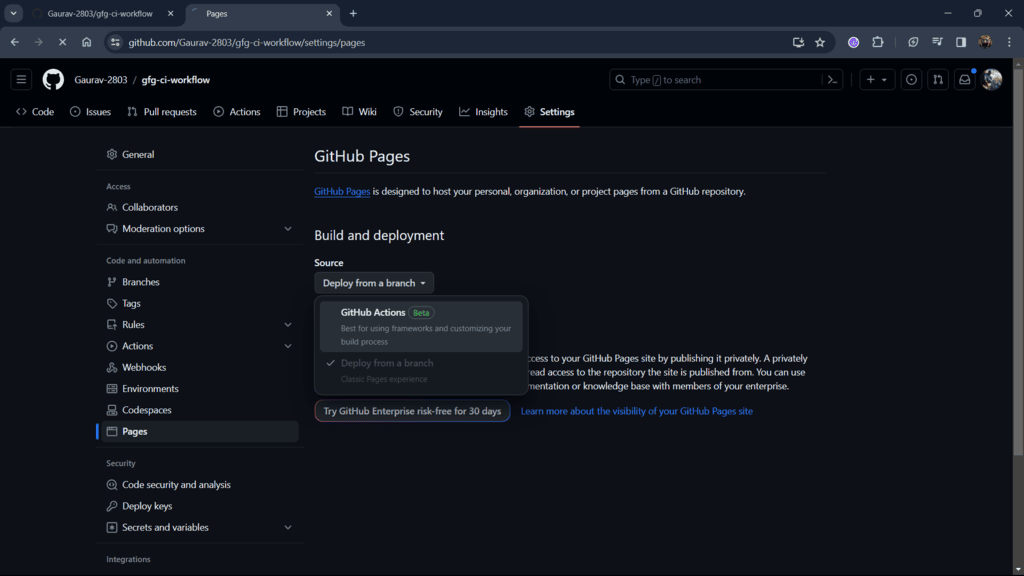
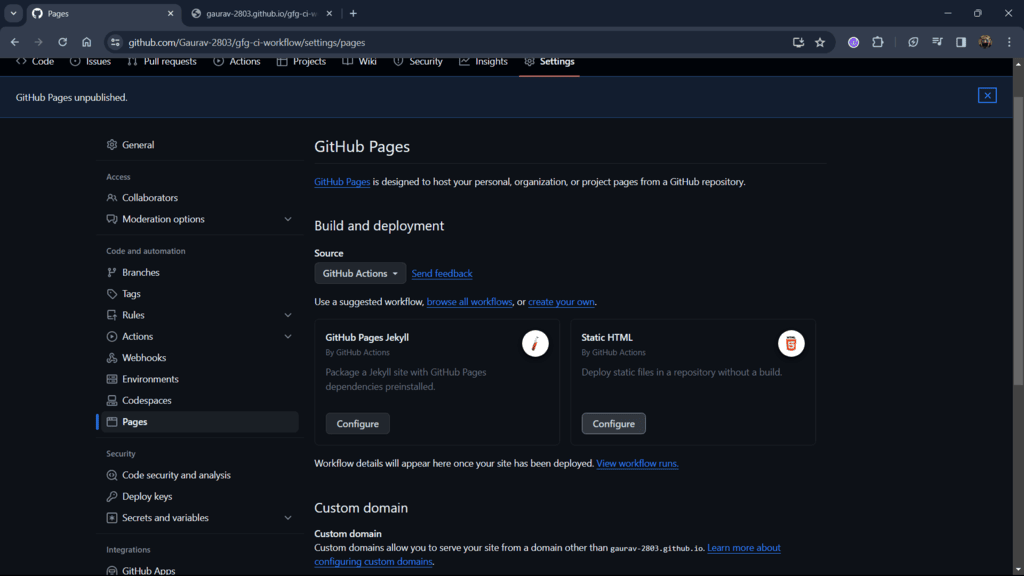
Step 4: Open your repository Settings, go to Pages, and select GitHub Actions as the source to enable CI-based deployment.
Step 5: Configure Static HTML to generate a pre-built workflow for your site. GitHub provides built-in workflows-select Static HTML (or any workflow that fits your project).
Step 6: The following image is the workflow YAML file that will automate your process of deployment. You change this according to your needs but for now let's just keep it as it is.
This files contains:
- name: Name of your workflow
- on: Action from which you to automate your task
- permission: Here we provide permissions to read, write our workflow files.
- jobs: This is where your mention all the task you want to automate.
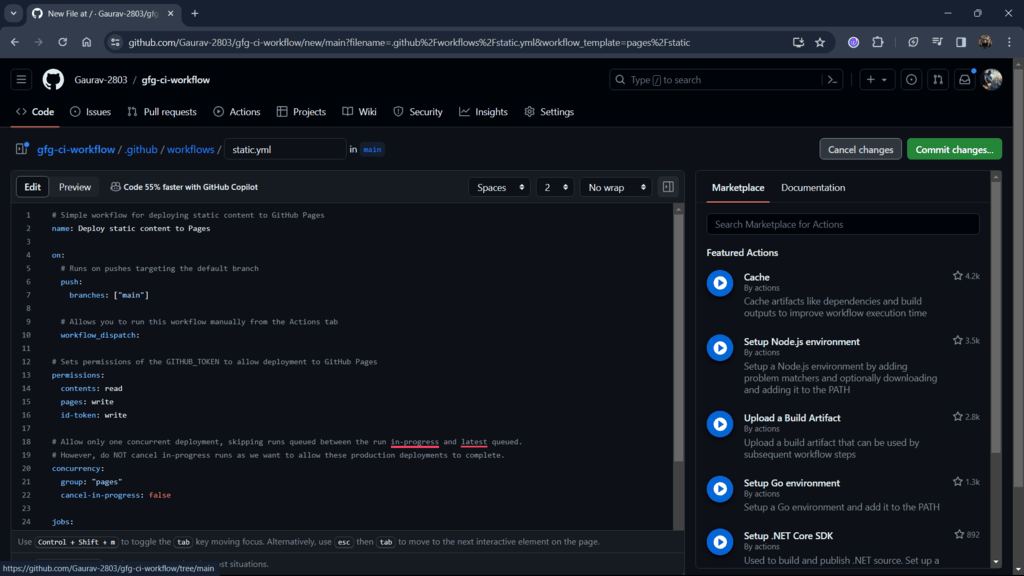
Step 7: Commit and push the file on your branch.

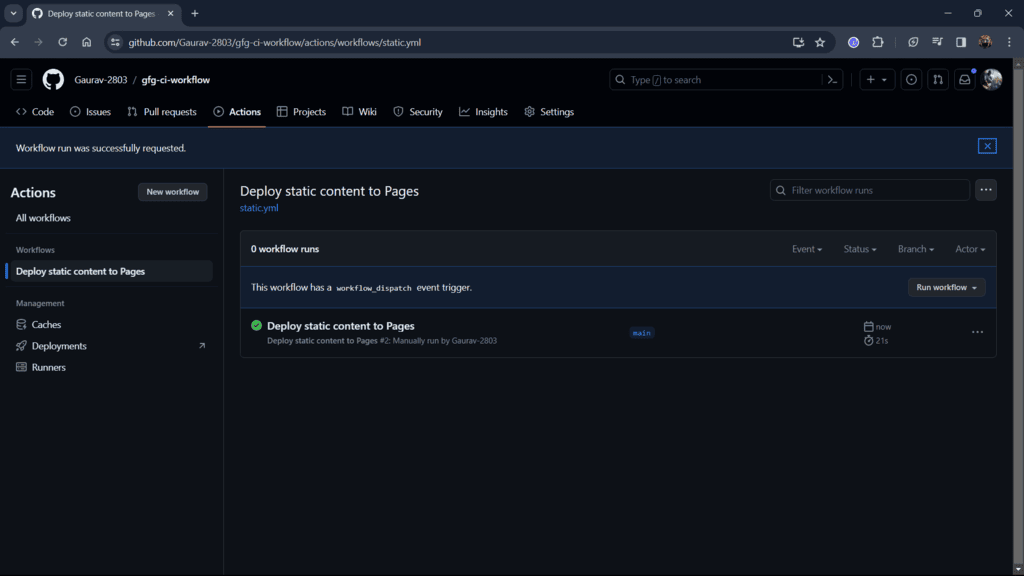
Step 8: Select the Static HTML workflow from GitHub’s built-in options.
Step 9: Go to the link provided by GitHub this is where your HTML file is deployed.
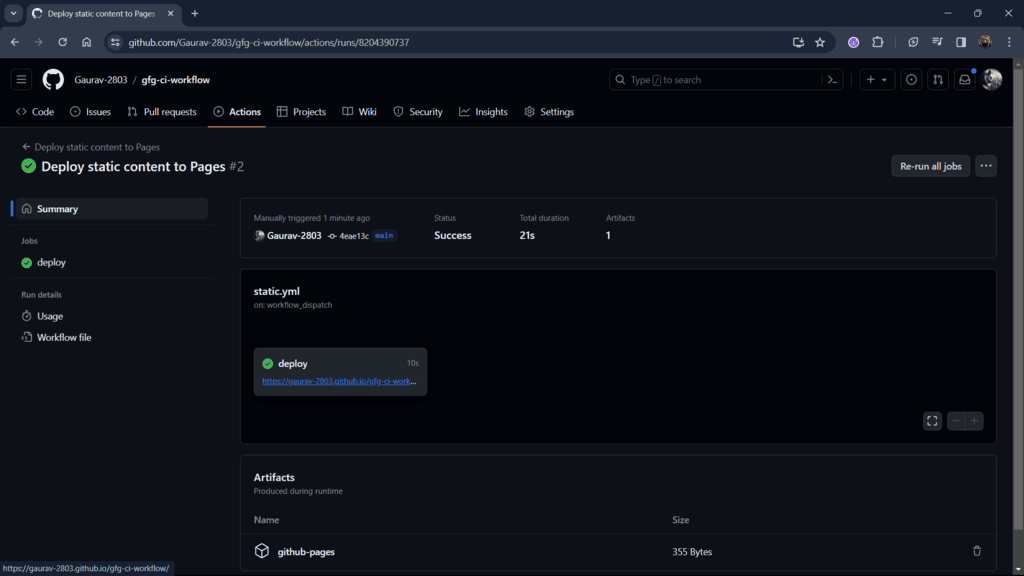
Step 10: After opening the link you can see the contents of your HTML file.

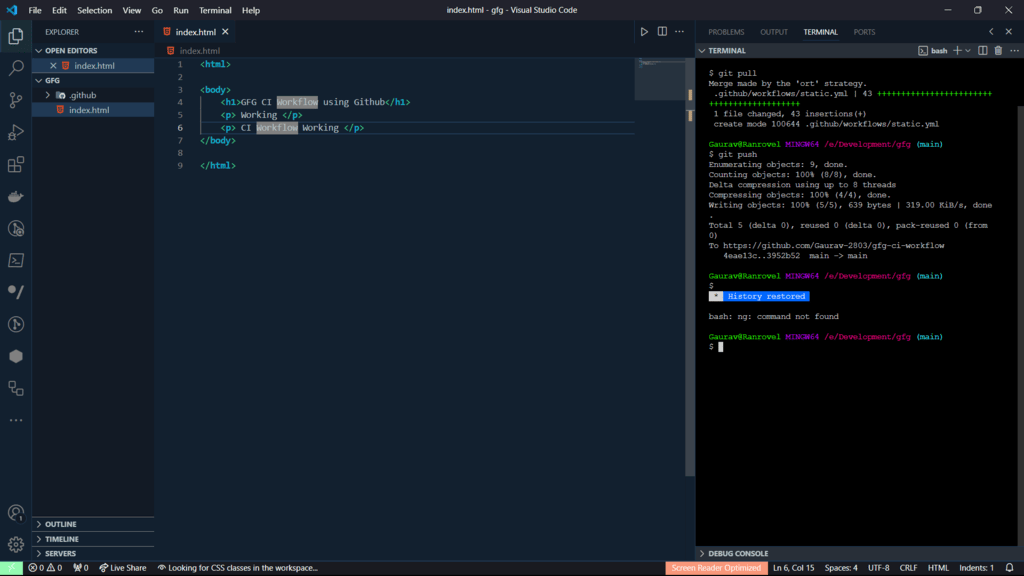
Step 11: Check if CI workflow or not. First, pull your changes.
- Modify your code and push it on the GitHub.
- For every push our workflow will be generated and changes will reflect on your page.
Step 12: Wait for 10-15 seconds and reload your site. The new changes will appear on the site.

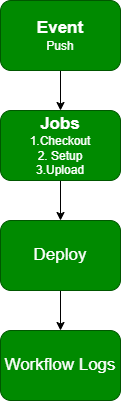
Automated CI/CD Workflow
- Push code changes to trigger the CI/CD workflow event.
- Workflow jobs (checkout, setup, build, upload) run automatically.
- Deploy changes as the final stage of the pipeline.
- Monitor logs to verify CI/CD execution and status.