In this article, we will learn how to build a basic web application using Flask, which is a lightweight Python framework create and run web apps.
Prerequisites
To follow this article, you need:
- Python 3.x installed on your system
- pip (Python package manager)
- Flask (will be installed during the steps)
Step-by-Step Process
Step 1: Install Flask
To install Flask, open your terminal or command prompt and enter below command:
pip install Flask
This command installs Flask along with the required supporting libraries.
Step 2: Create Your First Flask Application
Create a new Python file named app.py. This file will contain the code for your first Flask web application.
from flask import Flask

app = Flask(__name__)

@app.route('/')
def hello_world():
    return 'Hello World'

if __name__ == '__main__':
    app.run()
Explanation:
- Flask(__name__) creates the Flask application
- @app.route('/') connects the home URL (/) to a function
- The function returns text shown in the browser
- app.run() starts the local server
Step 3: Run the Flask Application
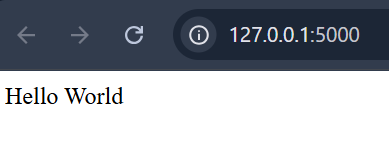
Run the command and you will see following in your terminal:

Open the given URL in your web browser to view your first Flask web page showing Hello World.
Step 4: Handling a POST Request Using an HTML Form
To understand how POST requests work in Flask, we will create a form that sends a user’s name to the server and displays it after submission.
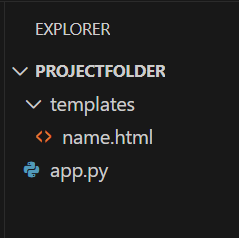
Folder Structure
Before writing any code, organize your project folder as shown below:
Explanation:
- app.py: Main Flask application file
- templates/: Flask automatically looks here for HTML files
- name.html: HTML form used to send POST data
Create the HTML Form
Inside the templates folder, create a file named name.html and add the following code:
<!DOCTYPE html>
<html>
<body>
    <h3>Enter Your Name</h3>
    <form method="post">
        <input type="text" name="username" required>
        <br><br>
        <input type="submit" value="Submit">
    </form>
</body>
</html>
Explanation:
- The form uses method="post" to send data securely
- The input field sends the value using the name username
- Clicking Submit sends the data to the Flask server
Now, Update app.py as shown below:
from flask import Flask, request, render_template

app = Flask(__name__)

@app.route('/login', methods=['GET', 'POST'])
def login():
    if request.method == 'POST':
        name = request.form['username']
        return f"Hello {name}, POST request received"
    return render_template('name.html')

if __name__ == '__main__':
    app.run(debug=True)
Output
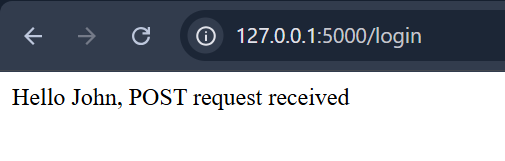
Open the browser and visit http://127.0.0.1:5000/login
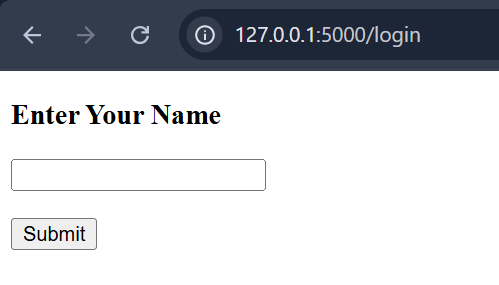
Now, Enter a name and click Submit
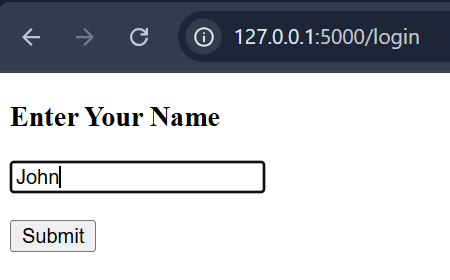
The browser displays:
Explanation:
- render_template() displays the HTML form
- methods=['GET', 'POST'] allows both request types
- GET request shows the form in the browser
- POST request reads submitted form data using request.form
- debug=True helps during development