AWS Elastic Beanstalk is a fully managed service that simplifies the deployment, management, and scaling of web applications in the AWS Cloud. It automatically handles infrastructure tasks such as provisioning servers, load balancing, monitoring, and scaling.
- Allows developers to deploy Java and Spring Boot applications easily without managing infrastructure.
- Supports automatic scaling, monitoring, and application health management.
Step-by-Step Implementation
Follow the steps below to create and deploy a Spring Boot application on AWS Elastic Beanstalk.
Step 1: Create a Spring Boot Application
Create a basic Spring Boot project using Spring Initializr.
Project Configuration:
- Project: Maven
- Language: Java
- Spring Boot Version: Latest stable version
- Group: com.example
- Artifact: demo
- Packaging: Jar
- Java Version: 17 or higher
Add Dependency
Select the following dependency:
- Spring Web
Download the project and open it in your IDE (STS, Eclipse, or IntelliJ).

Step 2: Create REST Controller
Create a new package called com.example.demo.controller and create a controller class named HelloWorldController. This controller exposes a simple REST API that returns a greeting message.
package com.example.demo.controller;

import org.springframework.web.bind.annotation.GetMapping;
import org.springframework.web.bind.annotation.RestController;

@RestController
public class HelloWorldController {

    @GetMapping("/")
    public String helloWorld() {
        return "Hello";
    }
}
When this API is accessed, it returns a simple Hello message.
Step 3: Configure Application Port
Add the following property in the application.properties file located in src/main/resources.
server.port=5000
AWS Elastic Beanstalk expects the application to run on port 5000, so we configure our Spring Boot application to listen on this port.
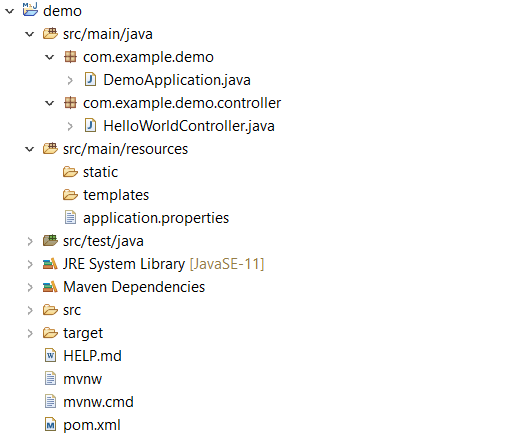
Step 4: Verify Project Structure
After completing the setup, the Spring Boot project structure should look similar to the following:
Step 5: Run the Application Locally
- Run the Spring Boot application from your IDE.
- Example: Right Click Project -> Run As -> Spring Boot App
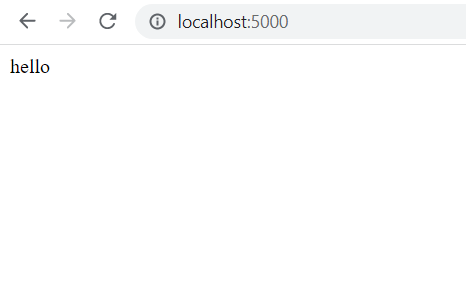
- Once the application starts successfully, open the following URL in your browser:
http://localhost:5000/
Output:
Deploy Spring Boot App to AWS Elastic Beanstalk
Now we will deploy the application to AWS.
Step 6: Build the JAR File
Before deploying the application, we need to create the executable Spring Boot JAR file.
In your IDE: Right Click Project -> Run As -> Maven Install
Alternatively, you can run the following command:
mvn clean install
After the build completes, the JAR file will be generated in the target folder.
Example:
target/demo-0.0.1-SNAPSHOT.jar

Step 7: Open AWS Elastic Beanstalk
Login to the AWS Management Console and search for Elastic Beanstalk. Open the Elastic Beanstalk dashboard to start deploying the application.

Step 8: Create a New Application
- Click the Create Application button.
- Provide the following details:
- Application Name: my-spring-app
- This will create a new application environment in Elastic Beanstalk.


Step 9: Select Platform
Then, under the platform section, select the platform details. We chose Java as the platform since we want to launch a Java application.
Select the Upload your code option beneath the Application code area as well.

Step 10: Deploy the Application
Finally, choose the spring boot application jar file created by the maven build, as shown below.

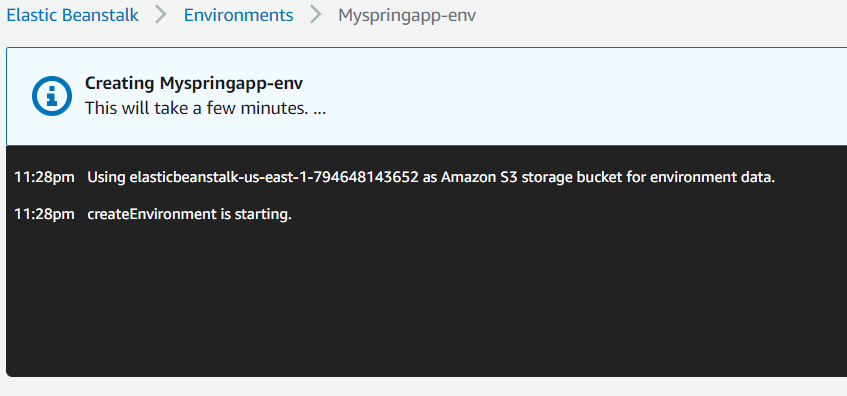
When you click the Create application button, the application begins to be deployed into the AWS elastic beanstalk.
When the application is successfully deployed, an entry appears under Environments, as seen below.
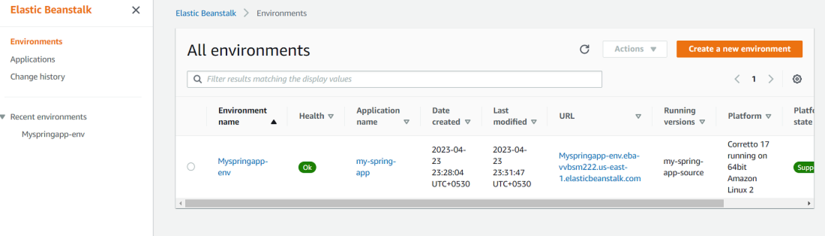
We can also observe that the application's health is OK and that the Recent events are displayed on the screen.

Step 11: Access the Deployed Application
Our application is handled via AWS elastic beanstalk. The application URL produced by the AWS Beanstalk allows us to visit our application. As indicated in the above image, the URL can be discovered on the application instance screen. To access the spring boot application, open the application URL.

