A Java Servlet Filter is used to intercept and process requests and responses before they reach a resource like a Servlet or JSP. It helps in performing pre-processing and post-processing tasks in web applications. Filters are part of the servlet specification and work transparently in the request-response cycle.
- Used for tasks like authentication, logging, and data validation.
- Can modify request/response before sending to the target resource.
- Applied to Servlets, JSPs, or static resources using configuration.
Servlet Filter in Web Application
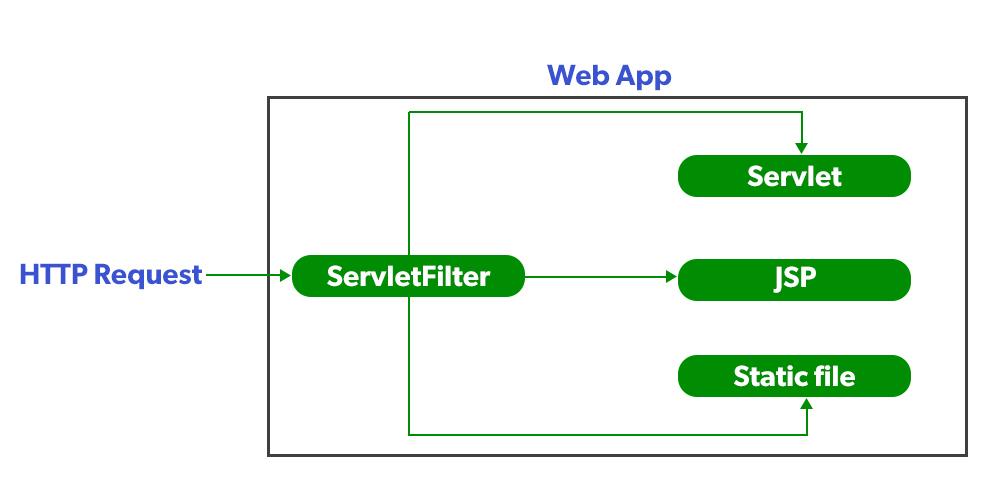
A Servlet Filter acts as an intermediary that intercepts client requests before they reach resources (Servlets/JSP/static files) and processes responses before sending them back to the client.
Servlet Filter Life Cycle
The lifecycle of a Servlet Filter is similar to that of a Servlet:
- Instantiate: The filter object is created by the container.
- Initialize (init): Called once to configure or allocate resources.
- Filter (doFilter): Called for each request, allowing pre-processing and post-processing.
- Destroy (destroy): Called once before the filter is removed, to release resources.
Interfaces belong to Filters
All these interfaces are available in javax.Servlet Package let's understand all filter one by one.
1. Filter
- Filter is an interface defined in the javax.servlet package.
- Every custom filter must implement this interface to work with the servlet container.
- The Filter interface provides three key lifecycle methods first init(), dofilter() and destroy().
Example:
public interface Filter {
    void init(FilterConfig config) throws ServletException;
    void doFilter(ServletRequest request, ServletResponse response, FilterChain chain) throws IOException, ServletException;
    void destroy();
}
Methods of Filter Interface
These are methods of the Filter interface in Java Servlet (javax.servlet.Filter / jakarta.servlet.Filter).
- init(FilterConfig config): Initializes the filter once during startup.
- doFilter(ServletRequest request, ServletResponse response, FilterChain chain): Core method to process requests/responses; calls chain.doFilter() to pass control.
- destroy(): Cleans up resources before the filter is removed.
Note:
- Filter information must be provide inside web.xml .
- Filter is mapped with one or more than one servlet.
2. Filter Configuration (web.xml)
Filters can be configured in web.xml or via annotations (@WebFilter).
<filter>
    <filter-name>f1</filter-name>
    <filter-class>MyBlockFilter</filter-class>
</filter>

<filter-mapping>
    <filter-name>f1</filter-name>
    <url-pattern>/servlet1</url-pattern>
</filter-mapping>

<servlet>
    <servlet-name>HelloServlet</servlet-name>
    <servlet-class>HelloServlet</servlet-class>
</servlet>

<servlet-mapping>
    <servlet-name>HelloServlet</servlet-name>
    <url-pattern>/servlet1</url-pattern>
</servlet-mapping>
Explanation:This configuration defines a filter f1 (MyBlockFilter) and a servlet HelloServlet, both mapped to the same URL pattern /servlet1. When a request is made to /servlet1, it first passes through the filter and then reaches the servlet.
3. FilterChain
FilterChain is an interface provided by the servlet container. It is used by filters to pass the request and response to the next filter in the chain or to the target resource (like a servlet or JSP) if it is the last in the chain
Method of FilterChain
Void doFilter(ServletRequest request, ServletResponse response): The doFilter() method processes incoming requests and outgoing responses in a filter. It allows you to modify or validate data before passing control to the next resource in the chain.
Void doFilter(ServletRequest request, ServletResponse response) throws IOException, ServletException;
Types of Filters
We can Develop three types of filters as listed below as follows:
1. Request Filter: Contain only pre-request Processing logic.
Example: Request count filter, Authentication filter, Authorization filter, Validation filter and etc.
2. Response Filter: Contain only Post-response generation logic.
Example: Conversion filter, Compression filter and etc.
3. Request-Response Filter: Contain both pre-request and post-response generation logic.
Example: Logging filter – it logs request details before processing and logs response details after processing.
Example Project – Block IP Address
In this example, we will create a simple web application that uses a Filter to block access based on the client's IP address. If the IP address is "127.0.0.1" (localhost), the user will not be able to access the site.
Step 1: Create a Dynamic Web Project
- Open Eclipse IDE.
- Go to File -> New -> Dynamic Web Project.
- Enter Project Name: IPBlockFilterProject.
- Target Runtime: Apache Tomcat (choose version installed).
- Dynamic Web Module version: 3.1 (or compatible).
- Click Finish.
Step 2: Create index.html
Create index file ->WebContent->index.html
index.html
<html>
   <head>
       <title>TODO supply a title</title>
       <meta charset="UTF-8">
       <meta name="viewport" content="width=device-width, initial-scale=1.0">
   </head>
   <body>
     <a href="servlet1">click here</a>
       <form>
   <body>
<html>
Explanation:Defines a basic HTML page with meta tags and a link to trigger servlet1, along with an empty form. However, it contains HTML issues like duplicate <body> tags and unclosed elements.
Step 3: Create the Filter Class
Create servlet filter inside-> src-> Right click -> New -> Class -> MyBlockFilte.
MyBlockFilter.java
package com.example.filter;

import java.io.IOException;
import java.io.PrintWriter;
import javax.servlet.*;

public class MyBlockFilter implements Filter {

    @Override
    public void init(FilterConfig config) throws ServletException {}

    @Override
    public void doFilter(ServletRequest req, ServletResponse resp, FilterChain chain)
            throws IOException, ServletException {

        String ip = req.getRemoteAddr();
        PrintWriter out = resp.getWriter();

        if (ip.equals("127.0.0.1")) {
            out.print("<h2>Your IP address is blocked by this website</h2>");
        } else {
            chain.doFilter(req, resp); // Forward request to next filter or servlet
        }
    }

    @Override
    public void destroy() {}
}
Explanation: MyBlockFilter implements the Filter interface, where init() runs once and destroy() is called on removal. The doFilter() method checks the client IP, blocks 127.0.0.1, otherwise allows the request to continue.
Step 4: Create the Servlet
Create Servlet inside-> src-> Right click -> New -> Class -> HelloServlet
HelloServlet.java
package com.example.servlet;
import java.io.IOException;
import java.io.PrintWriter;
import javax.servlet.ServletException;
import javax.servlet.http.*;
public class HelloServlet extends HttpServlet {
    @Override
    protected void doGet(HttpServletRequest request, HttpServletResponse response)
            throws ServletException, IOException {
        response.setContentType("text/html");
        PrintWriter out = response.getWriter();
        out.print("<h2>Hello Client, welcome to my Website...</h2>");
    }
}
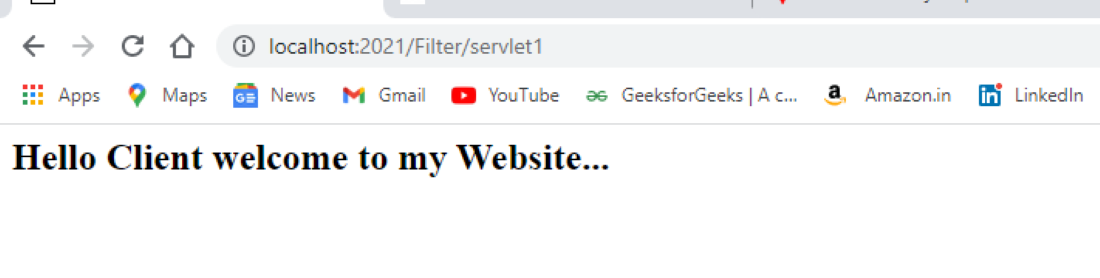
Explanation: HelloServlet extends HttpServlet and handles GET requests by overriding doGet(), where it sets the response type to HTML and uses PrintWriter to send output to the client. It returns a simple message "Hello Client welcome to my Website." and is mapped to a URL via web.xml or annotations.
Step 5: Configure web.xml
Create Configuration file inside -> WebContent->WEB-INF->web.xml
<web-app version="2.5"
xmlns="http://java.sun.com/xml/ns/javaee"
xmlns:xsi="http://www.w3.org/2001/XMLSchema-instance"
xsi:schemaLocation="http://java.sun.com/xml/ns/javaee
http://java.sun.com/xml/ns/javaee/web-app_2_5.xsd">

  <!-- Servlet -->
  <servlet>
    <servlet-name>HelloServlet</servlet-name>
    <servlet-class>com.filter.HelloServlet</servlet-class>
  </servlet>

  <servlet-mapping>
    <servlet-name>HelloServlet</servlet-name>
    <url-pattern>/servlet1</url-pattern>
  </servlet-mapping>

  <!-- Filter -->
  <filter>
    <filter-name>f1</filter-name>
    <filter-class>com.filter.MyBlockFilter</filter-class>
  </filter>

  <filter-mapping>
    <filter-name>f1</filter-name>
    <url-pattern>/servlet1</url-pattern>
  </filter-mapping>

</web-app>
Explanation: This web.xml config defines a servlet HelloServlet mapped to /servlet1 and a filter f1 (MyBlockFilter) also mapped to the same URL, so every request to /servlet1 first passes through the filter before reaching the servlet.
Step 6. Change Tomcat Port
By default, Tomcat runs on port 8080. We changed it to 2021:
- In Eclipse -> Servers tab -> Double-click Tomcat -> Ports -> Change HTTP/1.1 to 2021.
- Restart Tomcat.
Step 7: Deploy and Run
- Right-click project -> Run As -> Run on Server.
- Choose Tomcat Server.
- Open browser -> http://localhost:2021
- Click the link:
Output:
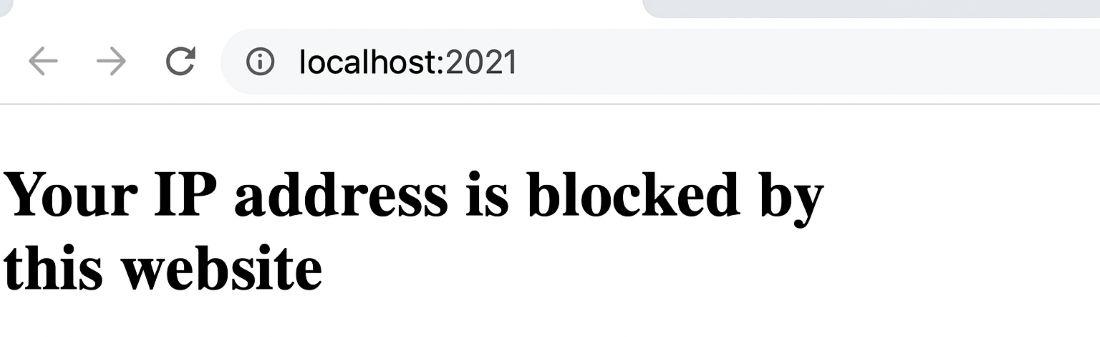
If our PC IP address is "127.0.0.1" we cannot visit the website and show below message
Your IP address is blocked by this website
If our PC IP address is not "127.0.0.1" then we can visit the website

On the page, user clicks "click here"
Explanation: The diagram shows that an HTTP request passes through the Servlet Filter before reaching the target resource, and the response also returns through the filter—enabling both pre-processing and post-processing.