The Spring Bean Life Cycle describes the sequence of steps a bean goes through from its creation to destruction within the Spring IoC (Inversion of Control) container.
Phases of Spring Bean Life Cycle
A Spring bean typically passes through the following phases:
- Container Initialization: The Spring IoC container is started.
- Bean Instantiation: The container creates an instance of the bean.
- Dependency Injection: Dependencies are injected using constructor, setter, or field injection.
- Initialization Callback: Custom initialization logic is executed.
- Bean Ready for Use: The bean is fully initialized and available for use.
- Container Shutdown: The Spring container is closed.
- Destruction Callback: Cleanup logic is executed before bean destruction.
The image below demonstrates the Spring bean lifecycle:

Note: Custom method names can be used instead of default lifecycle method names.
Ways to Implement Bean Life Cycle in Spring
Spring provides three standard ways to manage the bean life cycle:
- XML Configuration
- Programmatic Approach (Interfaces)
- Annotations
1. Using XML Configuration
In this approach, in order to avail custom init() and destroy() methods for a bean we have to register these two methods inside the Spring XML configuration file while defining a bean. Therefore, the following steps are followed:
Step 1: Create the Project
- Open IntelliJ IDEA.
- Click New Project -> Maven.
- Select JDK (Java 8 / 11 / 17).
- Enter:
- GroupId: beans
- ArtifactId: SpringXMLDemo
- Click Finish.
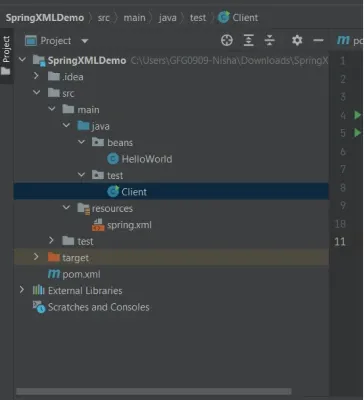
Step 2: Project Structure
Organize the project using standard Maven directories for Java source files and resource files.
Step 3: Add Spring Dependency
Open pom.xml and add:
<dependency>
    <groupId>org.springframework</groupId>
    <artifactId>spring-context</artifactId>
    <version>5.3.30</version>
</dependency>
Step 4: Create the Bean Class
Create a simple Spring bean with custom init() and destroy() methods to handle initialization and destruction logic.
HelloWorld.java
package beans;
public class HelloWorld {
    public void init() {
        System.out.println("Bean initialized using XML");
    }
    public void destroy() {
        System.out.println("Bean destroyed using XML");
    }
}
Explanation:
- init(): called after the bean is created.
- destroy(): called before the Spring container is closed.
- System.out.println(...) shows the method execution.
Step 5: Configure the Spring XML
Define the bean in the Spring XML file and register the init-method and destroy-method.
spring.xml
<?xml version="1.0" encoding="UTF-8"?>
<beans xmlns="http://www.springframework.org/schema/beans"
       xmlns:xsi="http://www.w3.org/2001/XMLSchema-instance"
       xsi:schemaLocation="
       http://www.springframework.org/schema/beans
       http://www.springframework.org/schema/beans/spring-beans.xsd">

    <!-- Bean definition with custom init and destroy methods -->
    <bean id="hw" class="beans.HelloWorld"
          init-method="init"
          destroy-method="destroy"/>
</beans>
Explanation:
- init-method="init"-> calls init() after bean creation.
- destroy-method="destroy" -> calls destroy() before container shutdown.
Step 6: Create Driver Class
We need to create a driver class to run this bean.
package test;
import org.springframework.context.ConfigurableApplicationContext;
import org.springframework.context.support.ClassPathXmlApplicationContext;

public class Client {

    public static void main(String[] args) {
        ConfigurableApplicationContext context =
            new ClassPathXmlApplicationContext("spring.xml");
        context.close();
    }
}
Explanation:
- ClassPathXmlApplicationContext loads Spring context and beans.
- context.close() triggers the destroy() method.
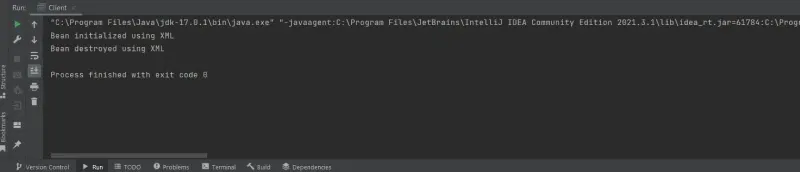
Step 7: Run the Application
Run the driver class to observe the execution of the bean’s initialization and destruction methods.
- Right-click Client.java -> Run 'Client.main()'.
Output:
2. Using Programmatic Approach (Interface)
In this approach, a Spring bean can define custom initialization and destruction logic by implementing two Spring-provided interfaces: InitializingBean and DisposableBean.
- afterPropertiesSet(): called after the bean is created and dependencies are injected.
- destroy(): called just before the Spring container is closed.
Note: To trigger the destroy() method, we must explicitly close the Spring container using ConfigurableApplicationContext.close().
Step 1: Create the Project
Create a Maven project in IntelliJ IDEA with the required GroupId, ArtifactId, and Java version.
- Open IntelliJ IDEA
- Click New Project -> Maven
- Select JDK (Java 8 / 11 / 17)
- Enter:
- GroupId: beans
- ArtifactId: SpringLifecycleDemo
- Click Finish
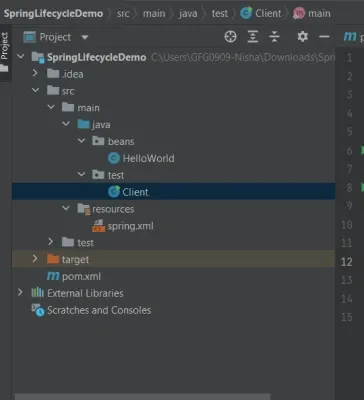
Step 2: Project Structure
Arrange the project into standard Maven folders for Java source files and resource files.
Step 3: Add Spring Dependency (pom.xml)
Add the spring-context dependency in pom.xml to enable Spring core and lifecycle support.
<dependency>
    <groupId>org.springframework</groupId>
    <artifactId>spring-context</artifactId>
    <version>5.3.30</version>
</dependency>
Step 4: Create the Bean Class
Implement InitializingBean and DisposableBean in the bean class to define custom initialization and destruction logic.
HelloWorld.java
package beans;
import org.springframework.beans.factory.DisposableBean;
import org.springframework.beans.factory.InitializingBean;
public class HelloWorld implements InitializingBean, DisposableBean {
    @Override
    public void afterPropertiesSet() throws Exception {
        System.out.println(
            "Bean HelloWorld has been instantiated and I'm the init() method"
        );
    }

    @Override
    public void destroy() throws Exception {
        System.out.println(
            "Container has been closed and I'm the destroy() method"
        );
    }
}
Explanation:
- afterPropertiesSet() runs automatically after bean creation.
- destroy() runs automatically before the container shuts down.
Step 5: Configure the Spring XML File
Define the bean in spring.xml so that Spring can manage its lifecycle.
spring.xml
<?xml version="1.0" encoding="UTF-8"?>
<beans xmlns="http://www.springframework.org/schema/beans"
       xmlns:xsi="http://www.w3.org/2001/XMLSchema-instance"
       xsi:schemaLocation="
       http://www.springframework.org/schema/beans
       http://www.springframework.org/schema/beans/spring-beans.xsd">

    <bean id="hw" class="beans.HelloWorld"/>

</beans>
Explanation:
- Registers HelloWorld as a Spring-managed bean.
- No need to specify init or destroy methods explicitly.
Step 6: Create the Driver Class
Load the Spring container using ClassPathXmlApplicationContext to initialize the bean. Close the ConfigurableApplicationContext to trigger the destroy() lifecycle method.
Client.java
package test;
import org.springframework.context.ConfigurableApplicationContext;
import org.springframework.context.support.ClassPathXmlApplicationContext;
public class Client {

    public static void main(String[] args) throws Exception {

        ConfigurableApplicationContext context =
            new ClassPathXmlApplicationContext("spring.xml");

        context.close();
    }
}
Explanation:
- Loads the Spring container.
- Closing the container triggers the destroy() method.
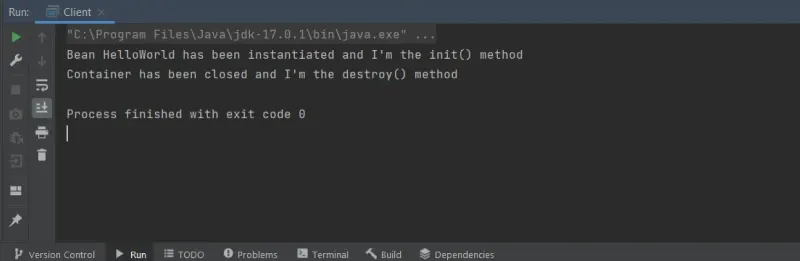
Step 7: Run the Application
Run the driver class to observe the execution of initialization and destruction methods.
- Right-click on Client.java
- Click Run
Output:
Note: This approach tightly couples the bean with Spring APIs, so it is not recommended for modern applications.
3. Using Annotations
In this approach, Spring provides lifecycle management using annotations instead of interfaces or XML configuration.
- @PostConstruct -> called after the bean is created and dependencies are injected.
- @PreDestroy->called just before the bean is destroyed.
Note: To invoke the destroy() method we have to call the close() method of ConfigurableApplicationContext.
Step 1: Create the Project
- Open IntelliJ IDEA
- Click New Project -> Maven
- Select JDK (Java 8 / 11 / 17)
- Enter: GroupId: beans, ArtifactId: SpringAnnotationLifecycleDemo
- Click Finish
Step 2: Project Structure

Step 3: Add Required Dependencies
<dependency>
    <groupId>org.springframework</groupId>
    <artifactId>spring-context</artifactId>
    <version>5.3.30</version>
</dependency>

<dependency>
    <groupId>javax.annotation</groupId>
    <artifactId>javax.annotation-api</artifactId>
    <version>1.3.2</version>
</dependency>
Step 4: Create the Bean Class
Create a simple bean class and use lifecycle annotations.
HelloWorld.java
package beans;
import javax.annotation.PostConstruct;
import javax.annotation.PreDestroy;
public class HelloWorld {

    @PostConstruct
    public void init() {
        System.out.println("Bean initialized using annotations");
    }

    @PreDestroy
    public void destroy() {
        System.out.println("Bean destroyed using annotations");
    }
}
Explanation:
- @PostConstruct runs after the bean is instantiated and dependencies are injected.
- @PreDestroy runs just before the bean is destroyed.
Step 5: Enable Annotation Support (XML)
Enable annotation processing in the Spring XML file.
spring.xml
<?xml version="1.0" encoding="UTF-8"?>
<beans xmlns="http://www.springframework.org/schema/beans"
       xmlns:xsi="http://www.w3.org/2001/XMLSchema-instance"
       xmlns:context="http://www.springframework.org/schema/context"
       xsi:schemaLocation="
       http://www.springframework.org/schema/beans
       http://www.springframework.org/schema/beans/spring-beans.xsd
       http://www.springframework.org/schema/context
       http://www.springframework.org/schema/context/spring-context.xsd">

    <context:annotation-config/>

    <bean id="hw" class="beans.HelloWorld"/>

</beans>
Explanation:
- CommonAnnotationBeanPostProcessor is enabled internally.
- Activates @PostConstruct and @PreDestroy annotations.
Step 6: Create the Driver Class
Create a class to load and close the Spring container.
Client.java
package test;
import org.springframework.context.ConfigurableApplicationContext;
import org.springframework.context.support.ClassPathXmlApplicationContext;
public class Client {
    public static void main(String[] args) {
        ConfigurableApplicationContext context =
                new ClassPathXmlApplicationContext("spring.xml");

        context.close();
    }
}
Step 7: Run the Application
- Right-click on Client.java
- Click Run
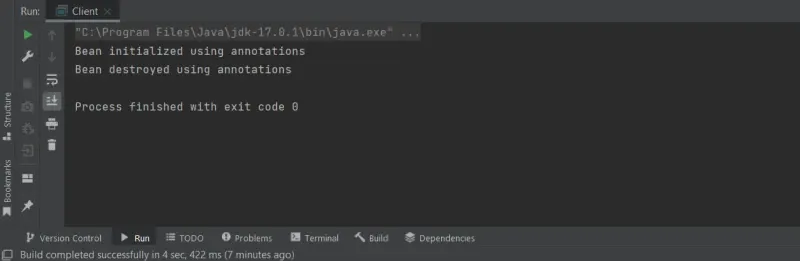
Output:
Note:
- This method is preferred for modern Spring and Spring Boot applications.
- No need to implement Spring-specific interfaces, keeping the bean clean and portable.
