Git is a powerful version control system that helps developers track code changes and collaborate efficiently on shared projects.
- Records every change, making it easy to track bugs and roll back updates.
- Enables multiple developers to work together without overwriting code.
- Provides essential commands and setup steps to get started with Git and GitHub.
Prerequisites
Before using Git, it must be installed on your system. Proceed with the installation steps specific to your operating system.
1. Checking Git Version
Before starting with any Git operations, it’s essential to check if Git is installed correctly on your system. The following command will show you the version of Git installed:
git --version2. Initializing a Git Repository (git init)
To start tracking a project using Git, you need to initialize a new Git repository in your project directory. This can be done with the git init command.
- Navigating to your Project Directory: Before using Git, navigate to your project directory:
cd <file path> command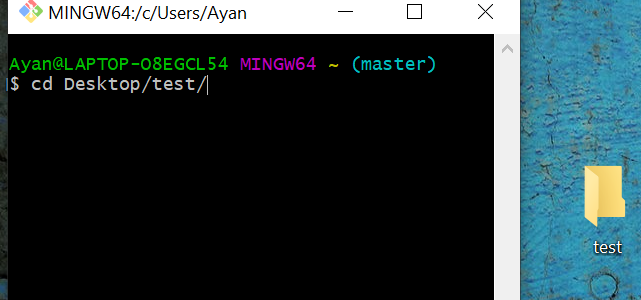
- Initialize Git Repository: Once you're in the project directory, run the following command to initialize a Git repository:
git init3. Git Configuration
After that, configure your username and email:
git config --global user.name "your Name"
git config --global user.email "your.email@example.com"
4. Forking and Cloning a Repository
Forking a repository means creating a copy of an existing repository in your GitHub account so that you can make changes without affecting the original repository.
After forking, a copy of the repository exists on GitHub under your account. You can then copy the repository URL and clone it to your local machine to start working on it.
How to Fork a Repository
- Go to the repository we want to contribute to on GitHub.
- Click the Fork button at the top right.
- Once forked, navigate to your GitHub profile and open the forked repository
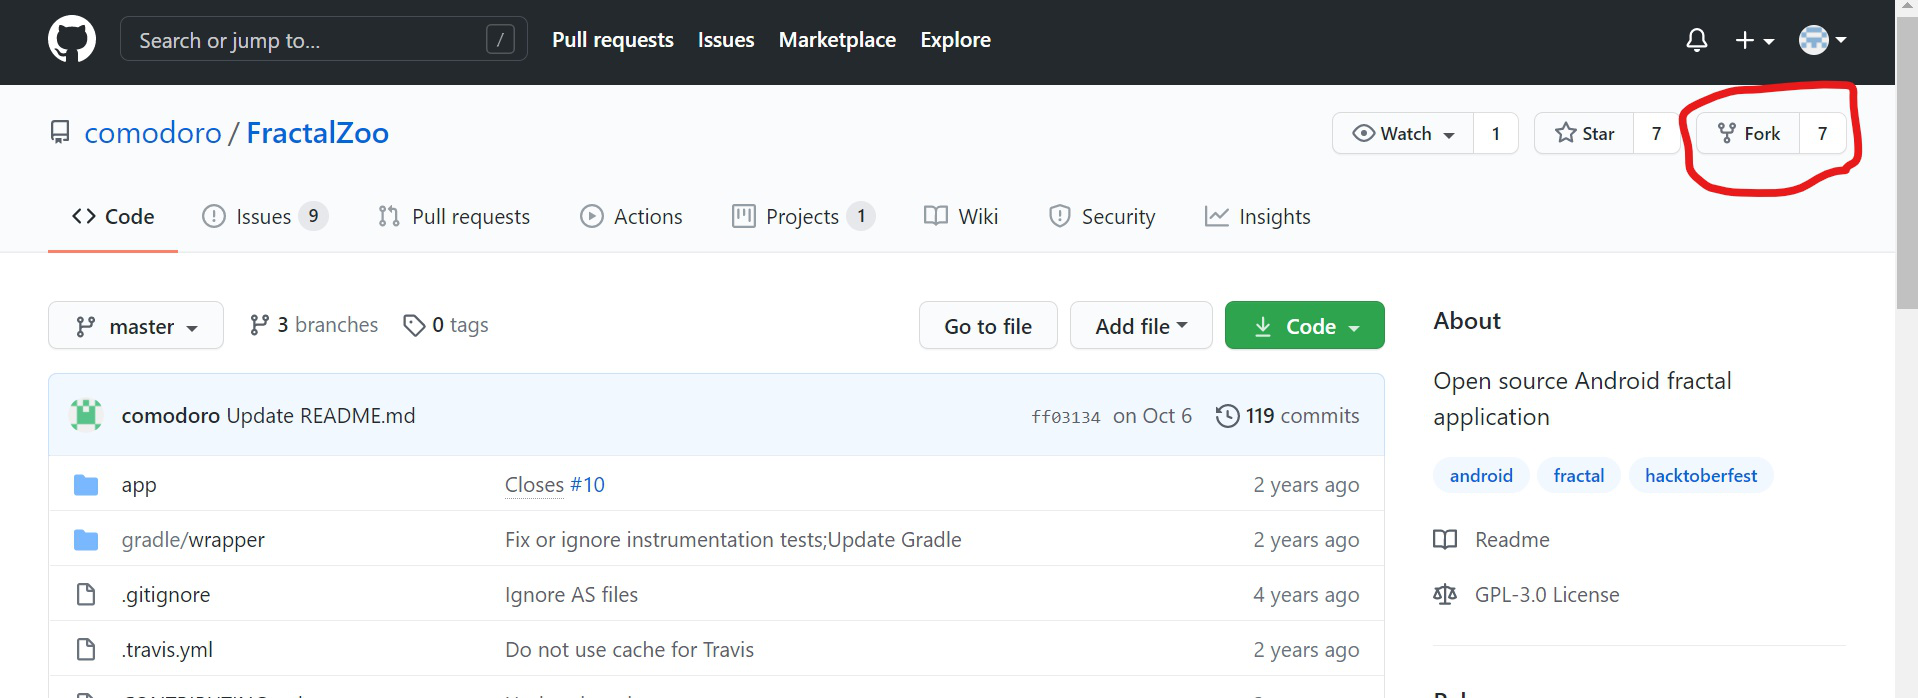
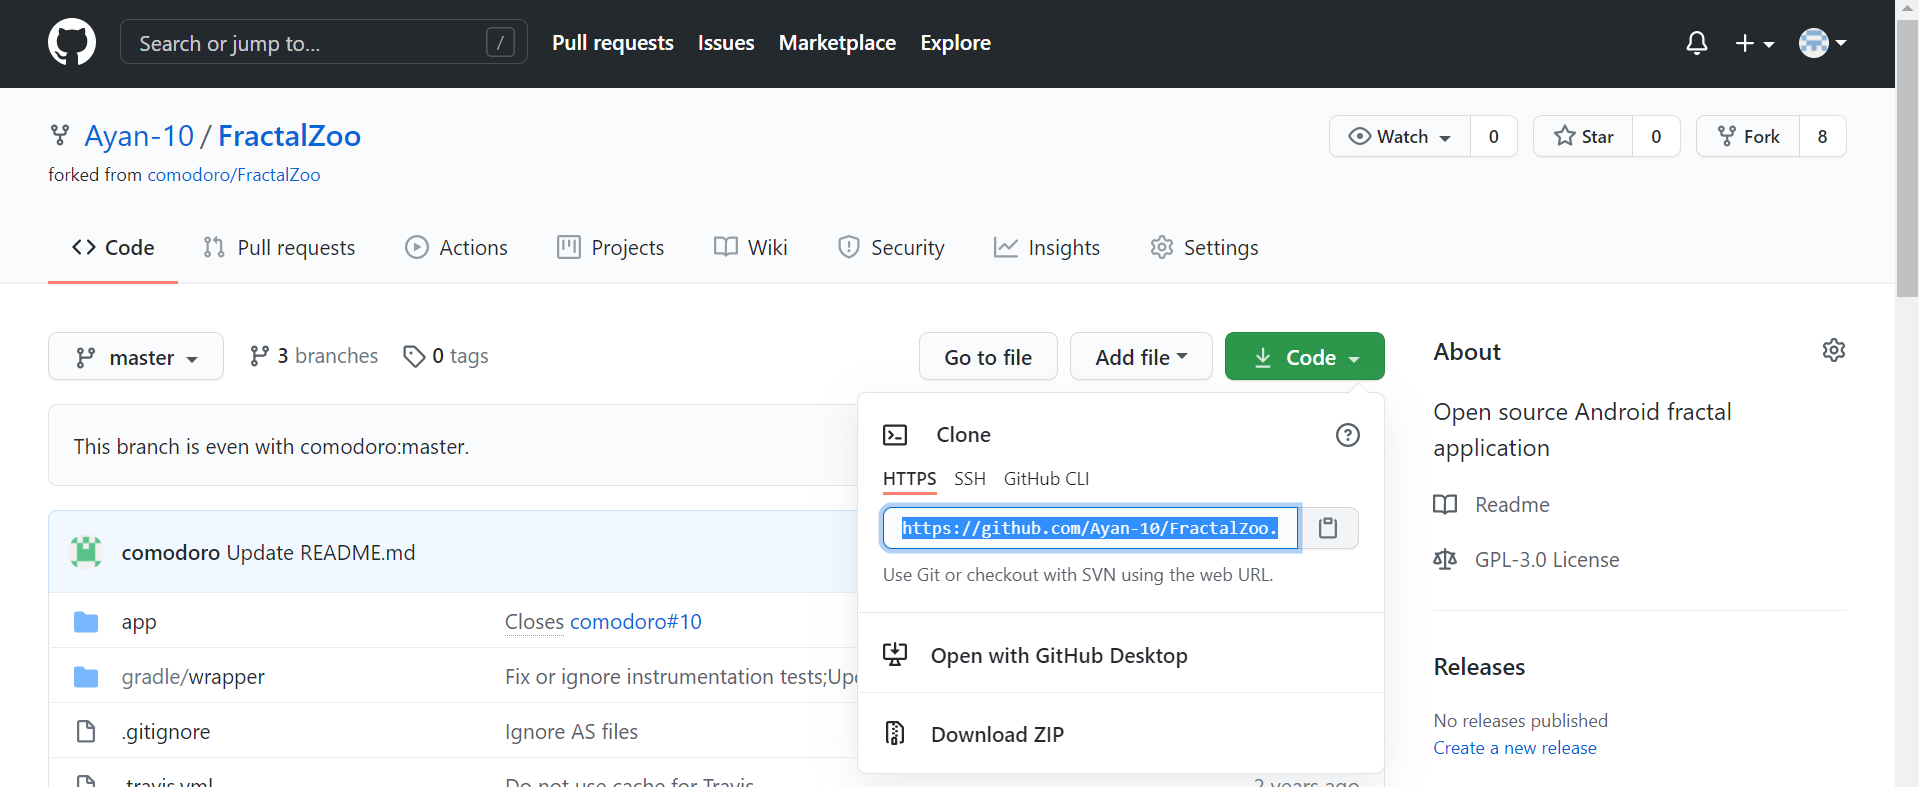
- Copy URL: Copy the repository URL from your fork on GitHub to clone it to your local machine.
5. Cloning the Repository Locally
After forking, clone the repository to your local machine
- Create a folder on your desktop where you want to store the project files.
- Open Git Bash and navigate to the newly created folder using the cd command:
cd <file_directory>- Copy the repository URL from GitHub.
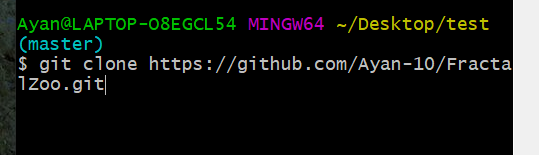
- In Git Bash, type the following command and press Enter
git clone <copied_url>- The repository will be cloned into your desktop folder, making the project files available on your system.
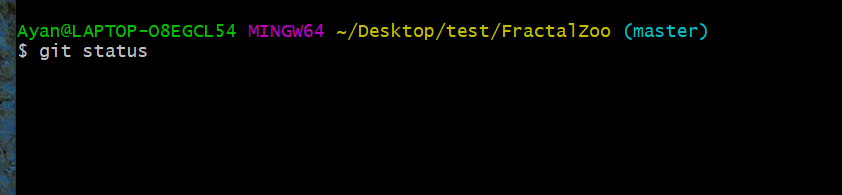
6. Checking the Status
After making code changes, check which files are not added using:
git status- Displays the current state of files in the working directory.
- Red files are unstaged or modified, while green files are staged and ready to commit.
7. Adding Files to Staging Area
When we get to know which files are not added by typing git status(red-colored files are not added).
- To track a file or prepare changes for commit:
git add <file_name>- To add all changes:
git add .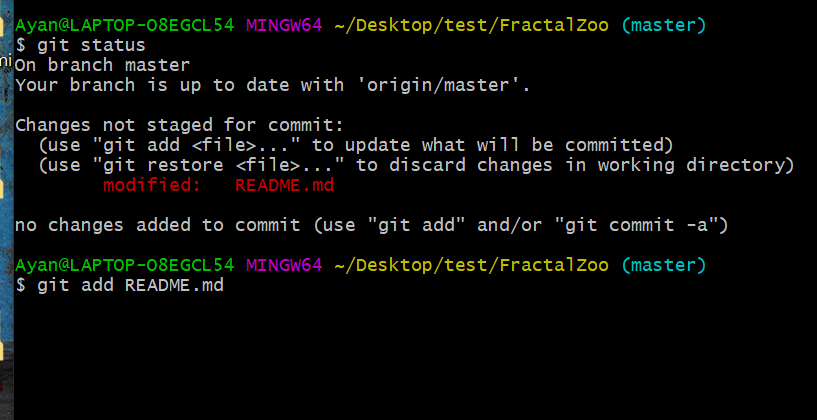
8. Committing Changes
- To save your changes in the local repository, first check the status using:
git status- Files displayed in green are staged but not yet committed. To commit these changes, use:
git commit -m "Your commit message"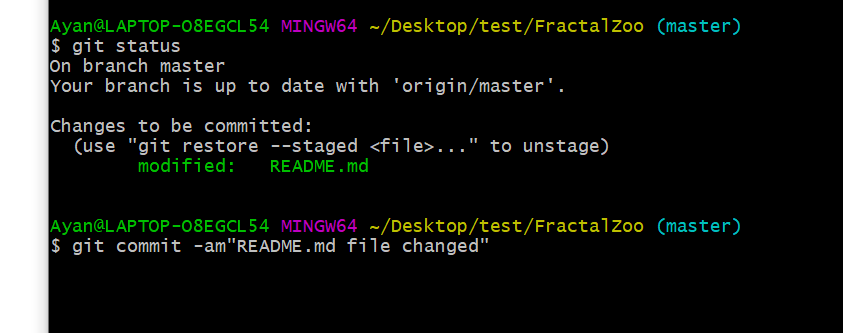
9. Pushing Changes to GitHub
To upload commits to your forked repository
git push origin <branch_name>
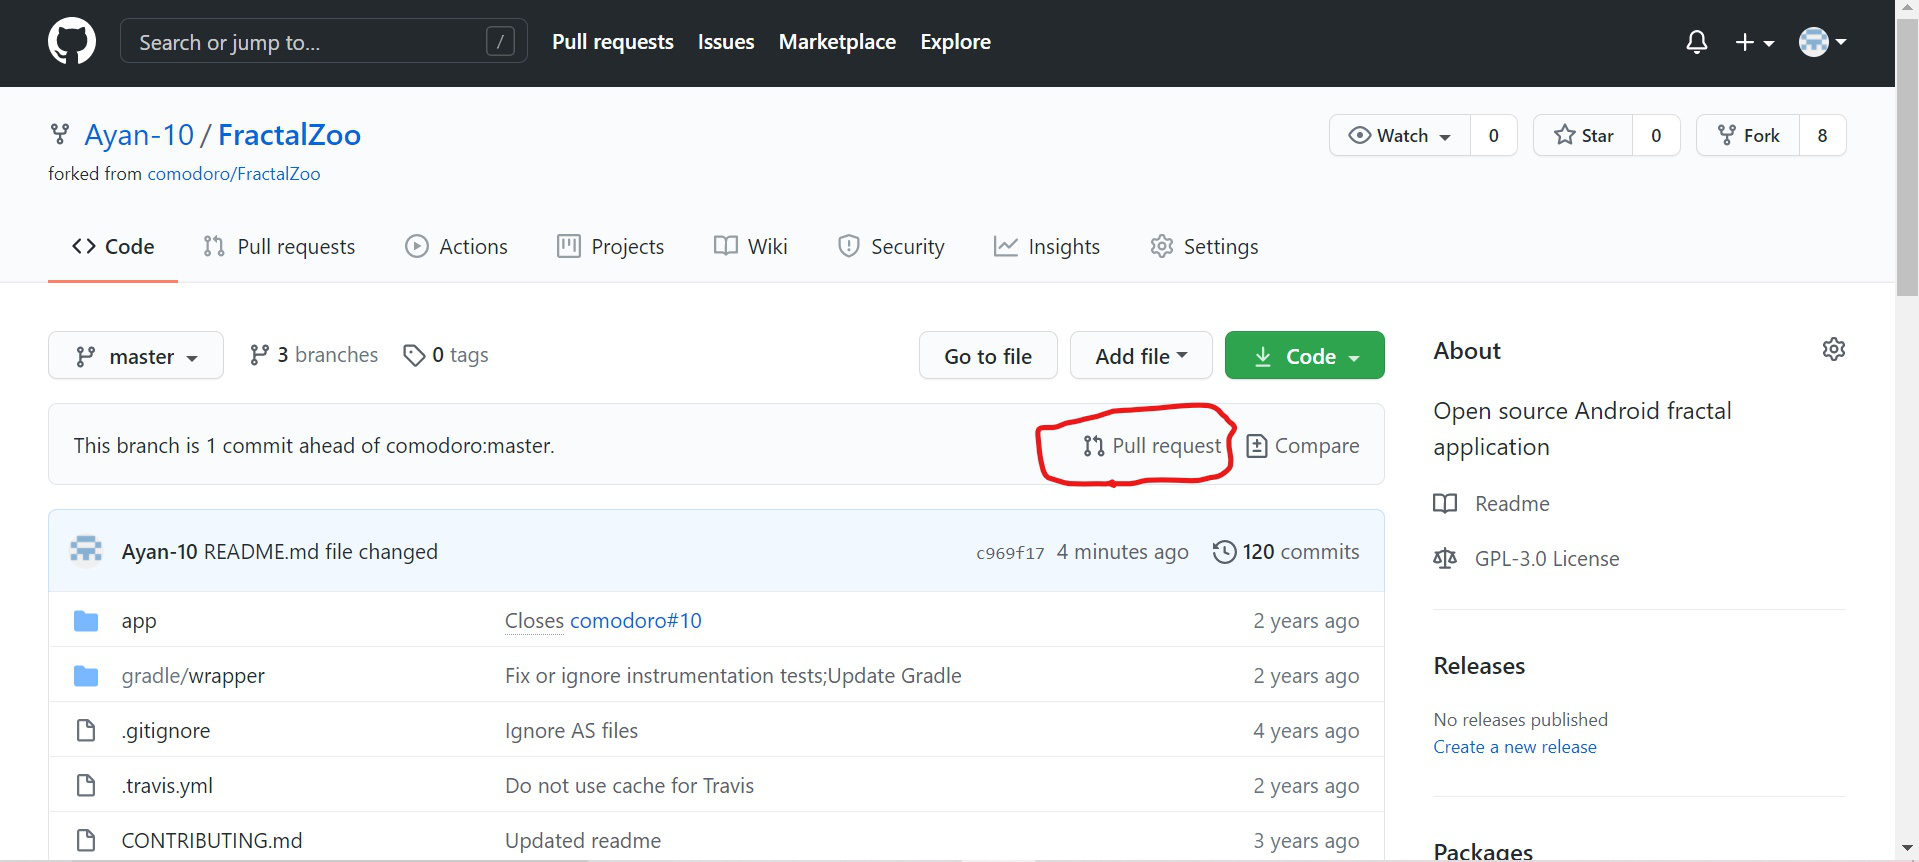
10. Making a Pull Request
Once your changes are pushed, you need to create a Pull Request (PR):
- Go to your forked repository on GitHub.
- Click on Compare & pull request.
- Add a title and description for your changes.
- Click Create pull request to submit your changes for review.
11. Merging Branches
To merge a branch into the current branch:
git merge <branch_name>If there are conflicts, Git will prompt you to resolve them manually before completing the merge. Once resolved, commit the changes using:
git commit -m "Merged <branch_name> into <current_branch>"To abort a merge in case of issues:
git merge --abort12. Deleting a Branch
To delete a local branch:
git branch -d <branch_name>To force delete
git branch -D <branch_name>