Conditional rendering controls which parts of the UI are displayed based on specific conditions. It is widely used to show or hide elements depending on user input, data state, or system status. This helps keep the interface relevant and responsive to changes.
- Displays different UI elements based on the current state or props.
- Automatically updates what the user sees when data or conditions change.
- Removes the need to manually manipulate the DOM to show or hide content.
Implementation of Conditional Rendering
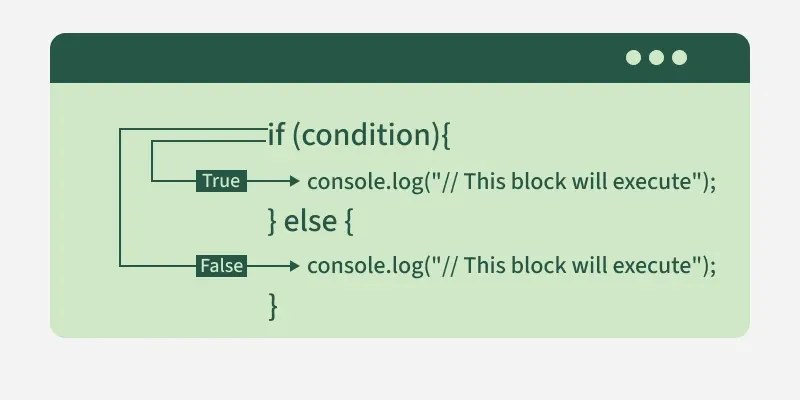
1. Using If/Else Statements
If/else statements allow rendering different components based on conditions. This approach is useful for complex conditions.
function Item({ name, isPacked }) {
    if (isPacked) {
        return <li className="item">{name} </li>;
    }
    return <li className="item">{name}</li>;
}- If isPacked is true, it displays: Space Suit
- If isPacked is false, it displays: Space Suit
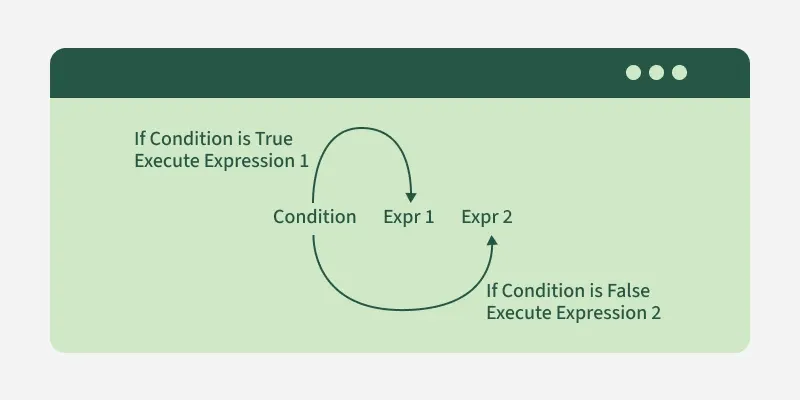
2. Using Ternary Operator
The ternary operator (condition ? expr1: expr2) is a concise way to conditionally render JSX elements. It’s often used when the logic is simple and there are only two options to render.
function Greeting({ isLoggedIn }) {
    return <h1>{isLoggedIn ? "Welcome Back!" : "Please Sign In"}</h1>;
}- If isLoggedIn is true: Welcome Back!
- If isLoggedIn is false: Please Sign In
3. Using Logical AND (&&) Operator
The && operator returns the second operand if the first is true, and nothing if the first is false. This can be useful when you only want to render something when a condition is true.
function Notification({ hasNotifications }) {
    return <div>{hasNotifications && <p>You have new notifications!</p>}</div>;
}- If hasNotifications is true: You have new notifications!
- If hasNotifications is false: Nothing is rendered.
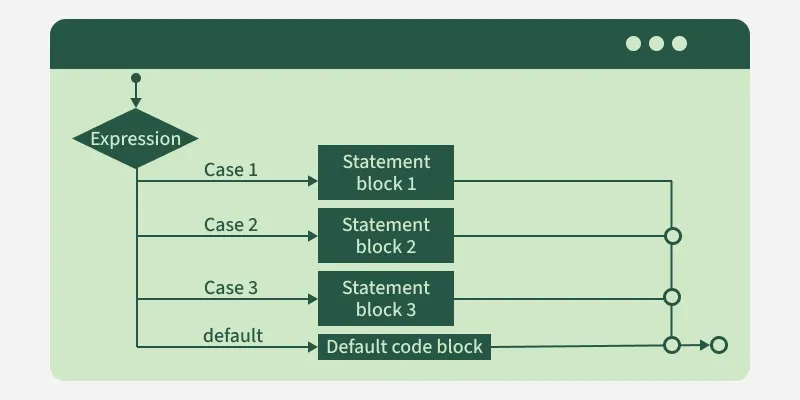
4. Using Switch Case Statements
Switch case statements are useful when you need to handle multiple conditions, which would otherwise require multiple if conditions. This approach can be more readable if there are many conditions to check.
function StatusMessage({ status }) {
    switch (status) {
        case 'loading':
            return <p>Loading...</p>;
        case 'success':
            return <p>Data loaded successfully!</p>;
        case 'error':
            return <p>Error loading data.</p>;
        default:
            return <p>Unknown status</p>;
    }
}- If status is 'loading': Loading...
- If status is 'success': Data loaded successfully!
- If status is 'error': Error loading data.
5. Conditional Rendering in Lists (Using .map())
Conditional rendering can be helpful when rendering lists of items conditionally. You can filter or map over an array to selectively render components based on a condition.
const items = ["Apple", "Banana", "Cherry"];
const fruitList = items.map((item, index) =>
    item.includes("a") ? <p key={index}>{item}</p> : null
);
If the item contains letter "a", it will be displayed.
6. Conditional Rendering with Component State
You can also manage conditional rendering based on the component's state. For example, you can show a loading spinner until some data is fetched, and then display the actual content once the data is ready.
Syntax:
if (loading) {
  // Render Loading Component
} else {
  // Render Data Component
}
Practical Use Cases for Conditional Rendering
1. Displaying User Profile Based on Authentication
You can conditionally render a user’s profile page if the user is logged in, or a login form if not.
import React, { useState } from 'react';

function App() {
    const [isAuthenticated, setIsAuthenticated] = useState(false);

    return (
        <div>
            {isAuthenticated ? (
                <h1>User Profile</h1>
            ) : (
                <button onClick={() =>
                    setIsAuthenticated(true)}>Log In</button>
            )}
        </div>
    );
}

export default App;
Output

In this example
- The component uses useState to manage the isAuthenticated state, which is initially set to false.
- The isAuthenticated state determines what is rendered: if false, a "Log In" button is displayed; if true, a "User Profile" heading appears.
- When the "Log In" button is clicked, setIsAuthenticated(true) updates the state to true, triggering a re-render.
- After the state update, the button is replaced with "User Profile", demonstrating conditional rendering based on authentication state.
2. Showing Loading State
You can display a loading spinner or message while waiting for data to be fetched.
import React, { useState, useEffect } from 'react';

function App() {
    const [isLoading, setIsLoading] = useState(true);
    const [data, setData] = useState(null);

    useEffect(() => {
        setTimeout(() => {
            setData('Fetched Data');
            setIsLoading(false);
        }, 2000);
    }, []);

    return (
        <div>
            {isLoading ? (
                <h1>Loading...</h1>
            ) : (
                <h1>{data}</h1>
            )}
        </div>
    );
}

export default App;
Output

In this example
- The component uses useState to manage two state variables: isLoading (initially true) and data (initially null).
- The useEffect hook runs once after the component mounts and starts a setTimeout to simulate fetching data after 2 seconds.
- When the timeout completes, setData('Fetched Data') updates the data state, and setIsLoading(false) changes isLoading to false.
- The component initially renders "Loading...", and once the state updates, it re-renders to display "Fetched Data".
Best Practices for Conditional Rendering
- Keep it simple: Try to avoid deeply nested conditions, as it can make the component hard to read and maintain. Use ternary operators or helper functions where possible.
- Early returns: Consider using early returns to handle conditions upfront, especially when there’s more than one condition.
- Component-based rendering: If the conditional rendering logic is complex, consider breaking it into smaller components to improve readability and reusability.
